MILLSAP FARM ELSEWHERE
W E B S I T E
This is the ninth Winter CSA!
Farm News: Soil Prep on Millsap Farm
March 21, 2017
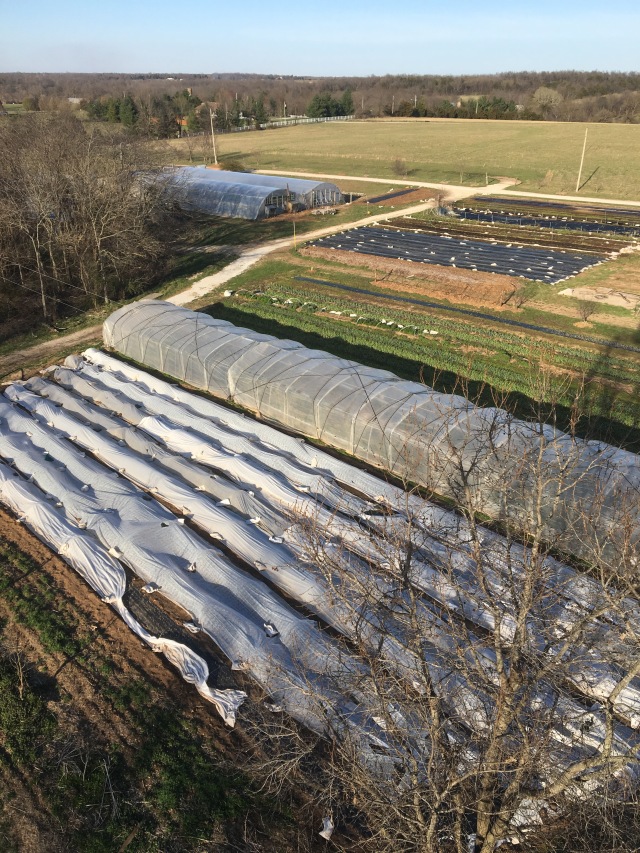
We’ve been busy the past couple of months getting our soil prepped for the season. This means making additions, subtractions, and modifications to our existing soil.
We’ve been adding Rabbit Manure, Compost, and Organic Fertilizers made of composted chicken litter, mined minerals, corn gluten, and alfalfa. These additions are things we put into our soil to boost the biological activity of the soil by increasing the organic matter and nutrients in the soil (in the case of the manure and fertilizer), and by increasing the diversity of the biological agents in the soil (in the case of the compost). Both of these types of additions are long-term investments in our soil, building structure, tilth (the ability of a soil to stick together like chocolate cake, rather than modeling clay) and resiliency to excess or insufficient water. What this means in shorthand is that we are preparing our soil to stay put and support plant life. Unfortunately, good soil supports both desirable and undesirable plants, which brings us to subtractions.
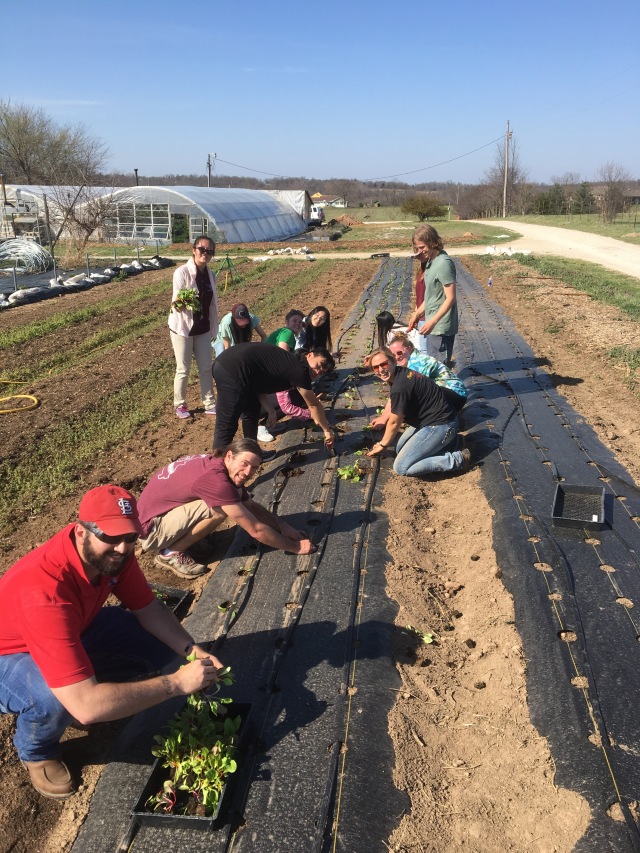
We’ve been working at reducing the weeds in our soil. We do this in several ways, but the primary technique we use in the off season is occultation, using black tarps to block the light from the surface of the soil. The strategy here is to provide the weeds with two out of the three things they need to grow; warmth and moisture, but not light. The tarp helps keep the moisture at the surface, and warms the soil by holding in heat from the sun, encouraging all those thousands of weed seeds to sprout… but when they break the surface, it’s dark, and they die within a week or two. This means that when we pull the tarps off to seed tiny seeds like carrots, lettuces, or arugula, as long as we don’t disturb the soil more than necessary, we have a clean seedbed that’s warm and moist, ready grow weed-free veggies. Of course, to get to this point, we’ve done quite a bit of modification to the soils from their resting state.
Soil Modification, in terms of bed preparation, is largely a matter of stirring the soil with our S tine cultivator, bed shaper, and rototiller, all pulled behind our two tractors. The goal here is to introduce more oxygen into the soil, warming it and accelerating the pace of the microbiological processes. We also use bed shapers to create beds which will drain and dry more quickly that the surrounding soil, which is helpful this time of year, when the soil is prone to stay muddy and cold.
Altogether it makes for a busy time of the year, balancing all these activities with ongoing planting, weeding, harvesting, and marketing. Speaking of marketing, if you haven’t done it yet, now is a great time to sign up for the CSA. Your membership helps to recognize the impact all of the CSA members across the country are having on the movement toward a more sustainable, life-affirming, community friendly form of agriculture.
Thank you for the privilege of being your farmers.
Curtis and Sarah, with Kimby, Cammie, David, Elsa, Julie, Erick, Erick, Adam, Emma, Ken, Hazel, and the many more community members who contribute to our mission to raise excellent food for you.
What’s in your share?
Full Share:
Spinach
Carrots
Head Lettuce
Sweet Potatoes (conventionally grown by Matthews Family Farm, AR)
Butternut Squash (conventionally grown by the Amish in Rich Hill, MO)
Zucchini
Elephant Garlic
Japanese Turnips
Kale
Swiss Chard
Chioggia Beets
Potatoes – ??
Leeks
Rosemary
Bread Share:
Market Place Bread – made by Emma and Anna Millsap
Half Share:
Spinach
Carrots
Head Lettuce
Sweet Potatoes (conventionally grown by Matthews Family Farm, AR)
Butternut Squash (conventionally grown by the Amish in Rich Hill, MO)
Zucchini
Elephant Garlic
Japanese Turnips
Kale or Swiss Chard
Sample Share:
Spinach
Carrots
Head Lettuce
Sweet Potatoes (conventionally grown by Matthews Family Farm, AR)
Zucchini
Elephant Garlic
Japanese Turnips
Help! I have 6 butternut squash staring at me in my kitchen!
It’s that time of year – the butternut squash just keep coming! Here’s some tried and true recipe ideas to use up that squash (we eat A LOT of butternut squash here on the farm!)
These are all recipes we have posted on our blog – i’m linking them here so you can click right over, but searching Butternut Squash at http://www.millsapfarms.com will also get you to these recipes.
Butternut Squash and Spinach Lasagna
– use your spinach and butternut in this recipe – a delicious twist on Lasagna
Butternut Squash sheet cake with brown sugar cream frosting
– it’s sweet and healthy(ier)!
Savory Butternut Squash and Black Bean Burritos
– a lovely combination!
Butternut Squash Corn Bread
– this goes great with
Chipotle Butternut Chili
(Featured last fall at the CSA appreciation dinner)
Chilean Butternut Squash Casserole
– try this dish of squash, corn, peppers and cheese!
————————————
A Simple Roasted Butternut Squash Salad (ohsheglows.com)
Yield: 4 to 6 servings
Ingredients:
For the roasted butternut squash:
1 large butternut squash (about 3-3.5lb) peeled, seeded, and diced (1/2-inch cubes, 8-9 cups chopped)
2 tablespoons melted coconut oil, or oil of choice
Fine sea salt, to taste
For the salad:
1 cup uncooked quinoa
1 large avocado, pitted and chopped
Fresh lemon or lime juice, to taste
Fine sea salt and freshly ground black pepper, to taste
Directions:
For the squash: Preheat the oven to 400F and line two large baking sheets with parchment paper.
Spread the chopped squash onto the baking sheets and drizzle on 1 tablespoon of oil over top each. Toss to coat. Spread the squash into an even layer, being careful not to overcrowd the squash, and garnish with a few pinches of sea salt.
Roast the squash until the bottoms are just starting to brown. For my oven, this takes about 50 minutes, but your time may vary. I recommend checking on it after 30 minutes, and then every 5-10 minutes after that. I don’t bother flipping it halfway through, but I do rotate the pans once half way through roasting as I have a hot spot in my oven. I find the squash tastes best when the bottoms are slightly browned (more than the photo shows).
For the salad: Prepare the quinoa once you have about 25 minutes left of roasting the squash. Rinse the quinoa in a fine mesh sieve and transfer to a medium pot. Add 1 3/4 cups water and bring to a simmer over medium-high heat. Reduce heat to medium, cover with a tight-fitting lid, and cook for 13-16 minutes, until the water is absorbed and the quinoa is tender and fluffy. Once cooked, fluff with a fork and remove from heat. Season the quinoa to taste with a generous amount of salt and pepper and stir to combine. Keep the lid on until ready to use so it stays warm.
Pit and chop the avocado and have it ready to go just before assembly.
When the squash is finished cooking, spread the warm quinoa onto a platter (or you can simply combine everything in a large bowl). Top the quinoa with all of the (hot out of the oven) roasted squash, and finally the chopped avocado. Garnish with a couple more pinches of salt, and a small amount of fresh lemon juice (or lime juice) drizzled over top (or you can try lemon or lime zest for a twist). I use a light touch with lemon juice as it can quickly overwhelm the other flavors. Serve immediately.
Tips:
Want to change this dish up? Here are some ideas on how you can create a new dish!
– Add some minced garlic to the cooked quinoa for a subtle garlic flavour
– Sprinkle on some garlic powder or nutritional yeast
– Add black beans, chickpeas, or any bean of choice for a boost of protein
– Try experimenting with spices like cumin + chili powder + cayenne; cinnamon + nutmeg; curry powder + coriander, etc.
– Switch it up and use lemon juice instead of lime juice, and vice versa
– Try sprinkling fresh minced herbs to finish, such as parsley or cilantro
– Switch up the grains – I think a small amount of rice would pair really well here
– Add finely shredded kale, chard, or spinach for a boost of green power
————————————
Glazed Hakurei Turnips
– Bon Appetit
10 SERVINGS
3 bunches baby hakurei turnips, baby turnips, or red radishes (about 2 pounds), trimmed, greens reserved
1/4 cup (1/2 stick) unsalted butter
3 tablespoons sugar
Kosher salt
Place turnips in a large skillet; add water to cover turnips halfway. Add butter, sugar, and a large pinch of salt; bring to a boil. Cook, stirring occasionally, until liquid is syrupy and turnips are tender, about 15 minutes. (If turnips are tender before liquid has reduced, use a slotted spoon to transfer turnips to a plate and reduce liquid until syrupy. Return turnips to pan and stir to coat well.) DO AHEAD: Can be made 4 hours ahead. Let stand at room temperature. Rewarm before continuing.
Add turnip greens to skillet and cook over medium heat, stirring occasionally, until just wilted, 2–3 minutes. Season with salt.
————————————
Savory Sweet Potato and Apple Bake
– 1 large sweet potato (the baby sized one you got in your share!) but into 1 inch cubes (it’s not necessary to peel them – only if you want too!)
– 2 to 3 tart apples – granny smith type, cut into 1 inch cubes
– 1 to 2 teaspoons diced fresh rosemary (sage or thyme are also good here)
– 1 red onion, chopped
– 2 Tablespoons or as needed olive oil
– salt and pepper to taste
Mix potatoes, rosemary, onion, olive oil, and pepper. Spread evening over a cookie sheet and roast for 25 minutes at 425 degrees. Add apples, gently stir and roast some more until apples are tender and sweet potatoes are caramelizing. (you can drop the temp to 400 when you put the apples in if you like.)
Sprinkle salt over the potatoes before you serve them!
note: the smaller you chop the potatoes, the quicker they will cook!
Thanks for choosing us to be your farmers!
~Millsap Farm Crew

